
Collecting Data Points With Single Widget Activations
Collecting Data Points with Single Widgets
Data points play a crucial role in capturing valuable user information in Activation Engine. Whether you’re collecting personal details, preferences, or user consent, setting up an efficient data collection process in the Single Widget Activation Builder is key. This guide walks you through creating forms, managing templates, and structuring data collection for optimal engagement.
For a full terminology breakdown, including standard vs. custom data points, see Data Points Overview
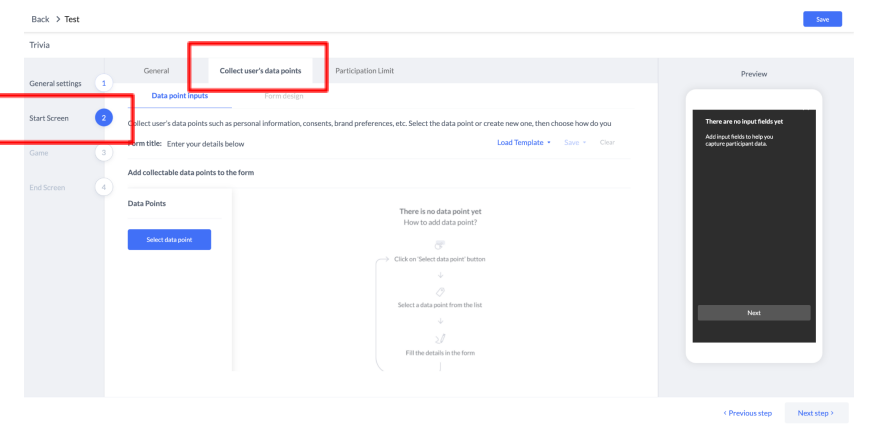
Once an activation was created as part of the start screen, click on ‘collect users' data points.
Creating Forms to Collect User Data Points
Once you start creating a new activation, navigate to the Collect User Data Points tab within the Activation Builder in the Start Screen section. This section allows you to configure a structured form for gathering user data points.
Loading Data Point Forms from Templates
Activation Engine allows you to streamline the form creation process by loading pre-saved Data Point Templates. Selecting a template will automatically populate the form with predefined data points and structures. (For detailed steps, see https://infrontlab.atlassian.net/wiki/spaces/EEKB/pages/658964482.)
Adding Data Points to Forms
To add a data point:
Click the Select Data Point button.
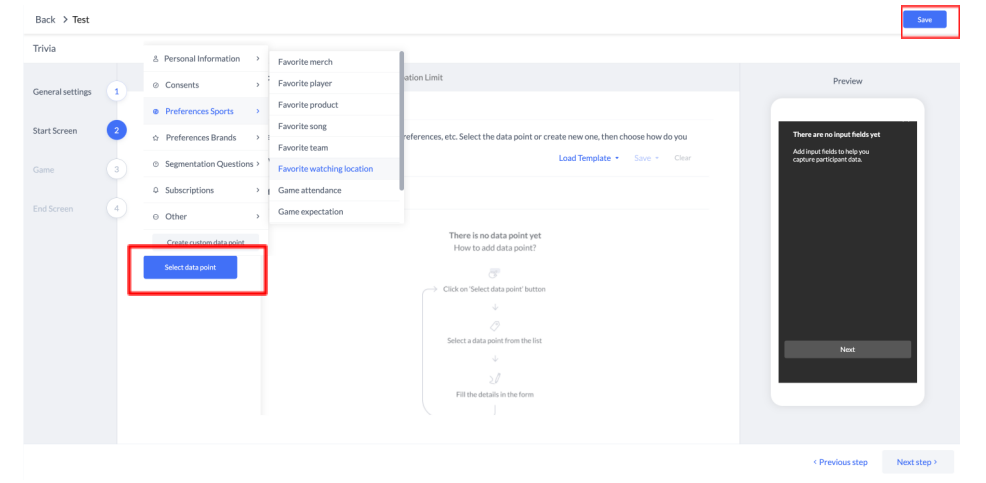
Click on ‘Select data point’, and choose the relevant data point you wish to add. Then adjust the text, form of capture and flow as you wish.
Choose from the available data points categorized for easier selection.
Identify standard vs. custom data points:
Standard Data Points: System-defined and available for all users.
Custom Data Points: Created by the client and marked with an icon. (For more, see Custom Data Points .)
Customizing Data Points: Each data point added to the form can be customized based on its input type. Customization options include:
Input Title: Displayed label for the data field.
Placeholder Text: Guide text inside the input field.
Additional Options: Certain data points include unique configuration settings depending on their type.
Conditional Input Appearance: Determines when and how the input field is shown.
Alternative Inputs: Enables progressive data collection by replacing fields dynamically.
Progressive Data Collection
Progressive data collection ensures a smooth user experience by dynamically adjusting input fields. Activation Engine utilizes:
Conditional Input Appearance: Automatically hides data points if the user has already provided that information in a previous activation.
Alternative Inputs: Displays new data points based on previously collected information to gather more insights over multiple interactions.
For a deep dive into progressive data collection, see Progressive Data Collection.
By following these structured steps, you can efficiently collect user data in Single Widget Activations, ensuring seamless integration with broader engagement and analytics strategies. (For exporting collected data, see Exporting Data Points Reports.)
Form Design
The appearance of your form significantly impacts user experience. Activation Engine provides design options to create visually appealing and intuitive forms. (For form design best practices, see [Form Design Guide].)