
Getting Started with Engage Engine
Engage Engine empower you to create highly engaging content that delivers real results. How? By engaging followers digitally, gathering essential data, identifying your most loyal fans and simplifying social publishing. Our robust and intuitive platform consists of two products: Activation Engine and Content Engine. The combo, and each individually, helps users save time, increase engagement, and achieve their marketing goals, leaving more time to focus on building stronger relationships with audiences.
Get Started with Activation Engine
Activation Engine is a powerful platform designed to help you create and manage effective social media activations. Here’s a step-by-step guide to get you started:
Before You Begin
Ensure your plan includes Activation Engine to access all necessary features. If it doesn’t, reach out to your Customer Success Manager to learn more.
1. Define Your Goals
What do you want to achieve with your activations? Are you aiming to increase brand awareness, drive sales, or foster community engagement?
Who is your target audience? Understanding your audience will help you tailor each activation to their interests and preferences.
What would you like to learn about your followers? This will help you define which data points you want to collect with each Activation.
2. Create a Campaign and Activation
Log in to your Engage Engine account.
Navigate to the "Campaigns" section and click "Create New Campaign."
Give your campaign a name and provide a brief description.

3. Design Your Activation
Choose the type of activation you want to run. Activation Engine offers various options, such as contests, giveaways, polls, and quizzes.
Customize the activation with your brand's colors, logo, and messaging. You can save your design as a template to use going forward.
Set the rules and eligibility criteria for participation.
Create your activation based on the prompts within each activation type, adding your headlines, questions, images and end screen CTAs.
Before you can activate and publish your content, please make sure to configure the following
Mandatory Configurations. To ensure a smooth and successful activation experience with Engage Engine. These configurations will help you define the parameters of your activation, target the right audience, and track its performance effectively.
4. Share your activation
Create a link from the publish tab in your activation. Note that you can create a link per channel in which you will share your activation and create QR codes.
Share your activation on social platforms, websites, apps or even LED Boards.
5. Monitor and Analyze
Track the performance of your activation using Engage Engine's analytics tools.
Monitor engagement metrics that might need adjustments to enhance user engagement.
Analyze the data to identify what's working and what's not and to better understand how to personalize your fans' experiences.
Tips for a Successful Activation:
Keep it simple. Avoid overly complex activations that may confuse participants.
Offer a compelling incentive. A valuable prize can significantly boost participation.
Widely promote. Use a variety of channels to reach your target audience.
Track and analyze. Use data to improve your future activations.
By following these steps and leveraging Activation Engine's features, you can create successful activations that help you achieve your social media and data goals.
Using Content Engine’s Content Planner
Content Engine’s Content Planner is a powerful tool designed to streamline your social media content creation and scheduling process. Here's a simple guide on how to do that:
Before You Begin
Ensure your plan includes Content Engine to access all necessary features. If it does not, contact your Customer Success Manager to learn more.
Properly connect your social networks to Engage Engine by following this guide: Connecting Social Media Profiles
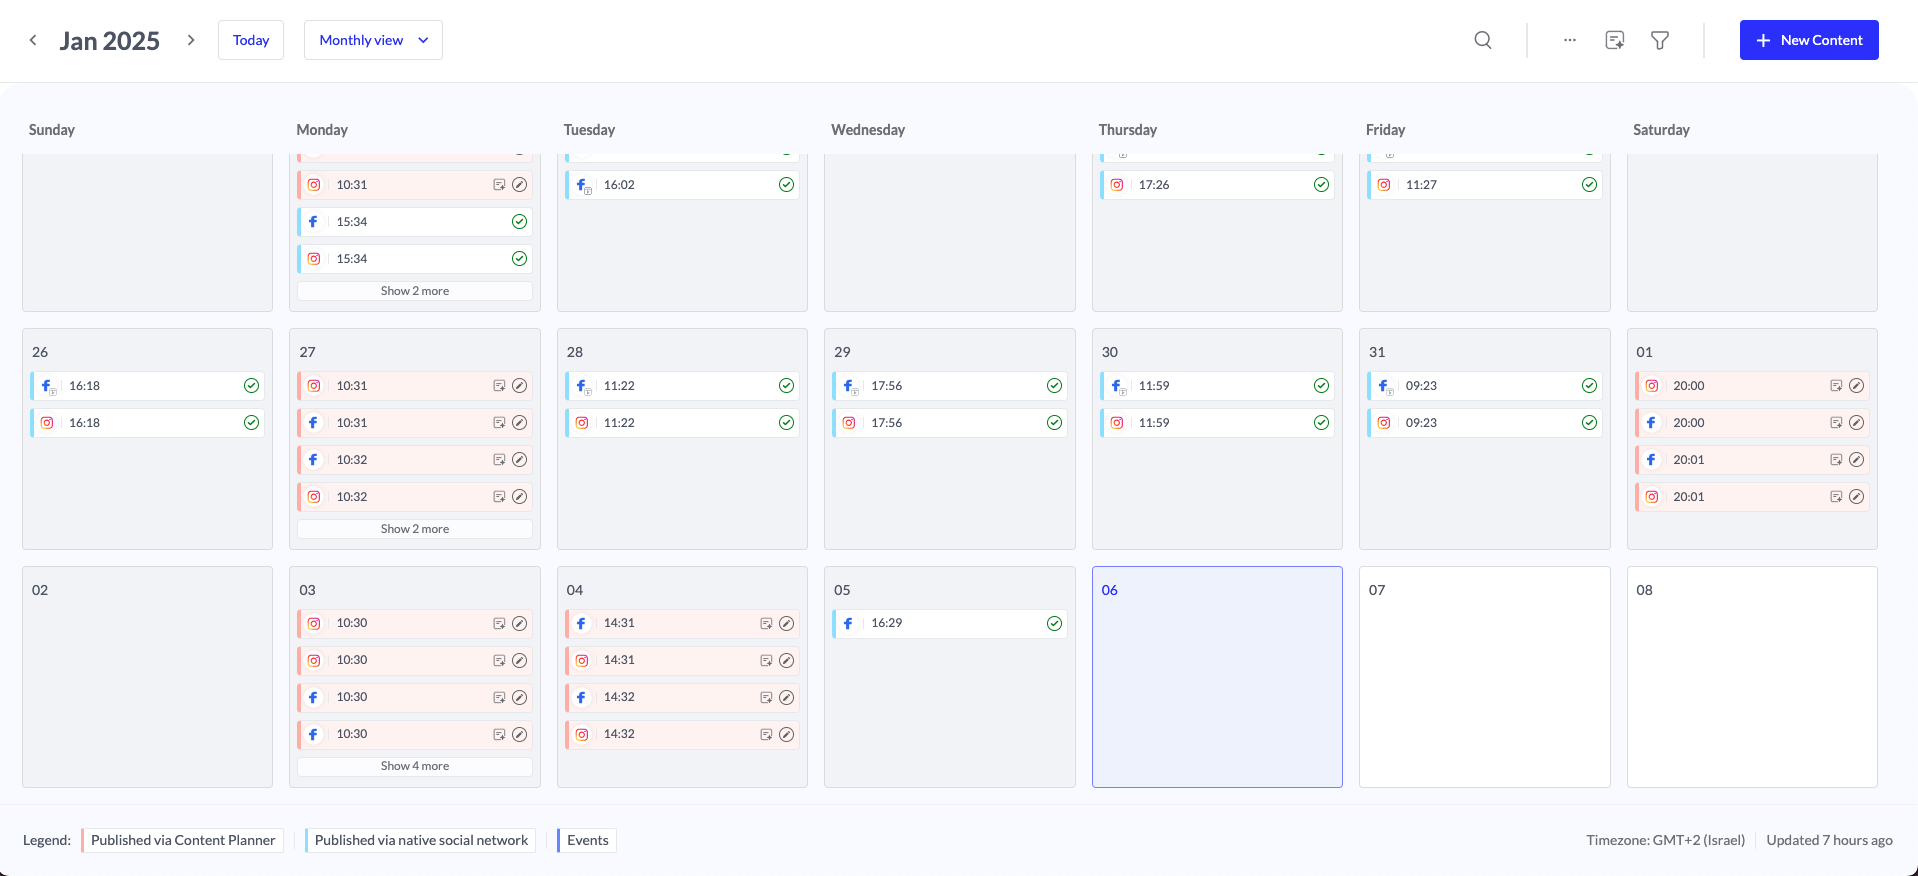
1. Access the Content Planner
Log in to your Engage Engine account.
Navigate to the "Content Planner" section.
2. Create and publish a Post
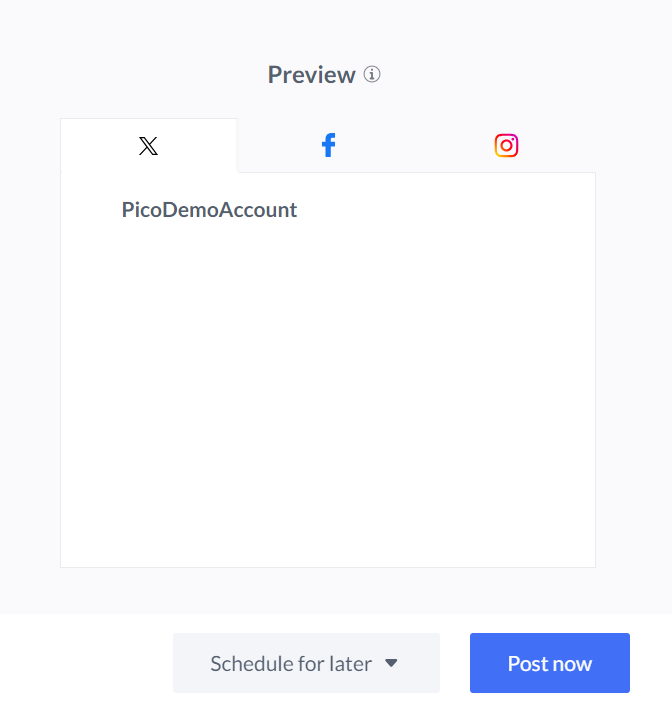
Create a new post by clicking on New Content in the top right hand corner.
Select your channels, upload your creatives and write your post.
If you have automation features, suggested content based on your predefined rules will automatically populate the calendar.
If you're ready to publish the post right away, look for a "Post Now" button. You can also save your post as a draft or schedule it for a later date or time.
3. Analyze Your Post
Find the specific post in your calendar view.
Click on the post to view its details, including the content, scheduled time, and target platforms.
Additional Tips:
Review Post Before Publishing: Always double-check the content, images, and links before publishing to ensure accuracy and avoid errors.
Consider Time Zones: If you're scheduling posts for multiple time zones, make sure to adjust the publishing times accordingly.
Utilize Engage Engine's Features: Explore other features of Engage Engine, such as analytics and reporting, to track the performance of your published posts.
By following these steps, you can effectively publish your posts from Content Engine Content Planner and ensure a smooth social media posting experience.